Meeting facilitators can easily send professional meeting email invitations once a meeting has been created.
Invitations include the meeting name, date, time, instructions for accessing the meeting, an outline of the agenda, and an attached calendar file (or ICS file). The ICS file makes it easy for people to accept the meeting in their Outlook or other calendar.
To learn more about what should be included in your invitations, read the Anatomy of the perfect meeting invitation email article on our blog.
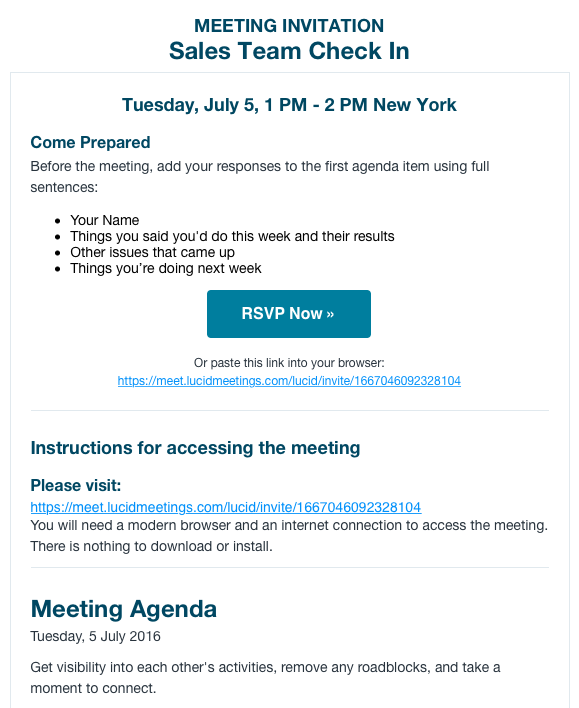
Meeting Invitation Email
The first time you invite someone to a meeting, you will need to know the email address to which you wish to send their invitation. After that, they will be added to the meeting room and can be simply selected from the list of room members when you schedule a subsequent meeting.
To send meeting invitations:
- Add people to your meeting.
You can do this when you first schedule the meeting, or at any time by clicking the Attendees tab then clicking Add more people. - Optional: Update attendee information
Click the Actions link next to a person's listing to update their basic information, meeting role, and RSVP status. - Click Send invitation email. This button will appear whenever there are attendees who have not already had an invitation sent to them.
 Sending the Invitation Email
 - Edit the email message (optional) then click Send Email.
You can re-send invitations at any time before the meeting by selecting Send invitations from the actions menu on the meeting home page.
You can send an invitation to just one person by finding them on the Attendees tab, clicking on the actions menu by their name, and selecting Send invitation.
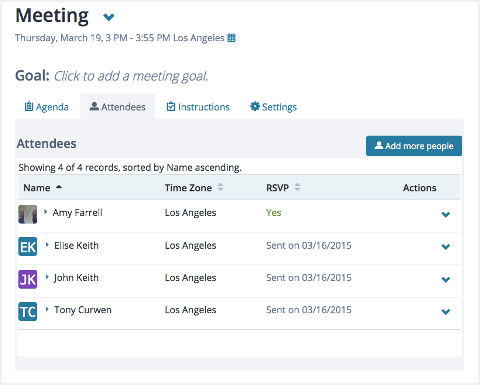
The meeting attendees tab
